With new hires, there are tons of paperwork and admin work to be done. We recognize that each organization's onboarding process may be unique, so we've built Harmony's onboarding process to be flexible, yet streamlined.
Pre-Requisites
- You have access to the Setup > Onboarding section of Harmony's HR module
- You have created the email template including the onboarding link
- You have mapped the email template to the correct onboarding notifications under Setup > Notifications
Creating a New Onboarding Record
- In Harmony's Human Resources module, navigate to Setup > Onboarding.
- Click "+ New" to create a new onboarding record.

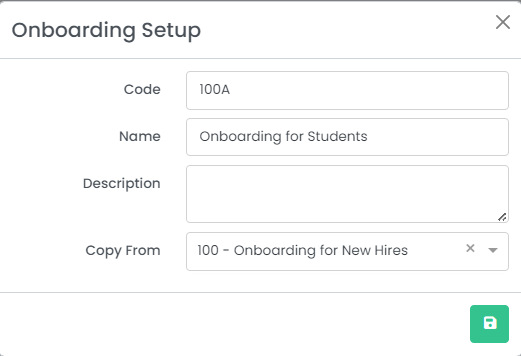
- Enter the required fields.
- "Code" refers to the unique ID for this onboarding process record.
- "Name" refers to the name for this onboarding process record.
- "Description" is an optional field for you to describe the onboarding process record.
- "Copy From" allows you to copy the steps from an existing onboarding process record.
- Click the save button to save your changes.
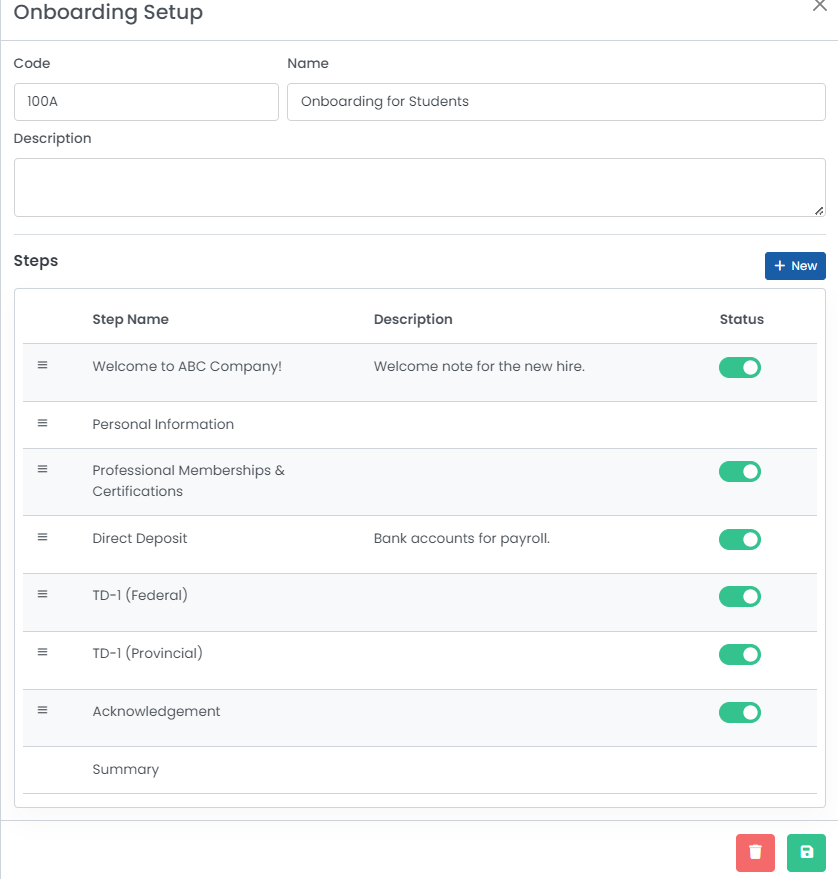
- Steps for the onboarding process will be shown in the bottom part of the window. Click "+ New" to add a new step.
Tip: If you already have steps in the onboarding process, you can select one and click "Clone" to clone/duplicate it! - Enter your required fields and click "Continue →" to continue.
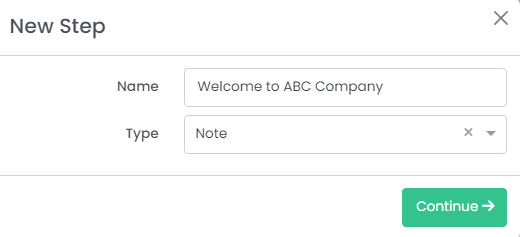
- "Name" identifies the name of the step to be shown during the onboarding process.
- "Type" identifies the different type for this onboarding step. Depending on the type you select, different options will be available for you to select and the new hire will be able to fill out different things.
- 'Note' refers to a simple text or message to show to your new hire.
- 'Acknowledgement' refers to a text or message that requires your new hire to acknowledge.
- 'Personal Information' refers to the Personal Information section in the employee profile, such as their name, date of birth, social insurance/security number, and address.
- 'Direct Deposit Information' refers to the employee's bank accounts, to be used for Payroll.
- 'Tax Forms' refers to the federal and provincial/state/territorial tax forms (e.g. W-4, TD-1) for your employees to fill out. These forms will be available to be pulled up in the Payroll module to update the employee's payroll-related information.
- 'Professional Memberships & Certificates' refer to the joined memberships and acquired certificates that the employee may be a part of or have. This is directly related to the section of the same name in the employee's HR-related profile.
- Enter additional fields as required. Take a look at the Types of Onboarding Steps section below for more information.
- For any step (no matter which type), you can make this step required or mandatory for the new hire to complete. Otherwise, the new hire may ignore it or submit that step as blank.
- You may want to preview the step prior to saving to ensure it is as expected. You can click the "Preview" button to preview.
- Click the save button to save your changes to the step.
- Repeat steps 5 through 9 for each step that you want to add to the onboarding process.
- If you want to deactivate a step in the onboarding process record but not delete it, use the toggle in the list of steps to toggle the step on or off.
Note: As soon as the new hire begins their onboarding process, you cannot modify it unless you send a new one. - If you want to delete a step in the onboarding process record, select the step you want to delete and click the trashbin button to delete it.
- Steps in the onboarding process can be reordered by dragging and dropping the hamburger button on the left side of the window (the icon that looks like three lines). The 'Summary' step will always be the last step of the onboarding wizard. This will provide a summary of all the fields that the new hire has filled. As such, you cannot reorder this step.
- Click the save button to the onboarding process record itself to save your changes.
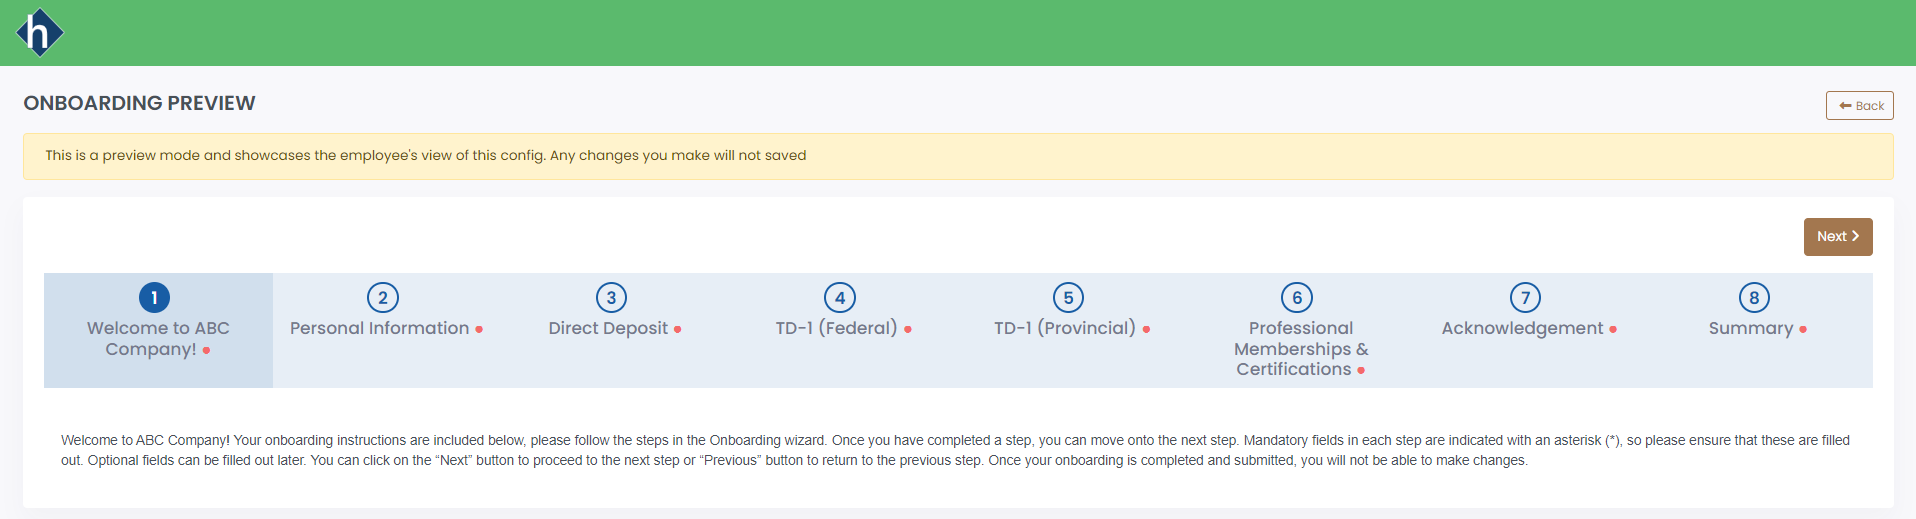
- In the list of all onboarding records, click the three (3) dots for an onboarding process record and click "Preview" to preview the entire process.
Types of Onboarding Steps
Note
The 'Note' options refers to a simple message or text box that you can enter for your employees to preview, such as a welcome message.

Acknowledgement
The 'Acknowledgement' option is very similar to the 'Note' option, in that it is also a body of text that you can enter, but you can also require the employee to acknowledge the text.

Personal Information
The 'Personal Information' option corresponds to personal information of the employee profile. You can select which fields that you want the new hire to complete, and identify if the field is required or not. Fields that the system requires, such as first name, will always be required and cannot be unselected to be optional for the new hire to complete.

Direct Deposit Information
The 'Direct Deposit Information' option allows your new hire to enter their bank account information for Payroll. You may allow the new hire to enter more than one (1) bank account to be entered into Payroll. Please refer to the Payroll module for more information.

Tax Forms
The 'Tax Forms' option allows you to upload a fillable PDF version of your federal or provincial/state/territorial tax form for your new hire to fill out. Completed tax forms will be shown in the Payroll module of Harmony for you to easily make changes if required. You can download the fillable PDF versions of your country and province/state/territory's tax form from the government websites.

Professional Memberships & Certificates
The 'Professional Memberships & Certificates' option allows your new hire to track any professional memberships that they are a part of, or any professional certificates that they have achieved that may be vital for their new role. This is directly related to the Professional Memberships section of the employee's HR profile.

Initiating a New Onboarding Process for a New Hire
- In Harmony's Human Resources module, navigate to Setup > Onboarding.
- For the onboarding process that you'd like to initiate, click the three (3) dots.
- Select 'Invite New Hire'.

- Enter the "Name" and "Email" address for the new hire that you want to initiate the onboarding process for.
- If you want to initiate the selected onboarding process for more than one new hire, click the "+" button.

- Click "Send" to send the invitation. Your new hire will receive the email with the onboarding link for them to complete.
Note: As soon as the new hire begins their onboarding process, you cannot modify it unless you send a new one.
Reviewing a New Hire's Onboarding Process
- In Harmony's Human Resources module, navigate to Employees > Onboarding. A list of all new hires in the onboarding process will appear.
- Select a record to view the progress.
- Click the "Resend Email" button to resend the onboarding email if required. This will resend the onboarding invitation link to the new hire.
- Once a new hire's onboarding process is initiated, the status will be 'Draft'. This is where the new hire will be able to enter information into the onboarding process.
- Once a new hire's onboarding process is submitted, the status will change to 'Submitted'. The new hire can no longer add additional information to the onboarding process. The record must then be approved. Either the approver or the super administrative user can approve and add additional details to fully complete the employee profile, such as employee ID and start date.
- Once the new hire's onboarding process is approved, the status will change to 'Approved' and the employee record will be created.