Harmony now integrates with QuickBooks® Online.
Note: This article discusses the integration with QuickBooks® Online and how to use QBIS. If you have QuickBooks® Desktop, view this article instead.
Table of Contents:
Prerequisites:
- Have posted the payroll you want to export from Harmony
- Have QBIS downloaded, installed, and configured correctly (*included when you purchase QBIS)
- Have created your account codes/numbers/names in QuickBooks® Online
- Know if you require the export in a detail or summary format
Note: By default, QuickBooks® Online uses account names. You must go into your QuickBooks® Online settings in order to use account codes/numbers, if you prefer.
Solution:
I. Setting Up Your GL Export Interface
- In Harmony, navigate to the Payroll module.
- Navigate to Admin Settings > Interfaces > GL Export Interfaces.
- Find “QBONTDET - QuickBooks Online Detail” or “QBONTSUM - QuickBooks Online Summary”. Toggle on either one of these to activate it and set it as your default export interface. If you're not sure what the difference between these two are, see the bottom of this article.
II. Define Your GL Account Numbers/Names
- In Harmony Payroll, navigate to Payroll Setup > General Ledger Setup > Account Setup.
- Define your debit/credit account numbers for each department and/or payroll category that you have identified in your application. By default, QuickBooks® Online uses account names. To use account numbers, you will have to toggle this on in your QuickBooks® Online settings.
- Click the save icon at the top right of this window to save your changes.
III. Define Your GL Account Structure
- In Harmony Payroll, navigate to Payroll Setup > General Ledger Setup > Structure.
- You can either create a new structure, or modify the pre-existing one that comes default in Harmony. By default, the structure is “Category GL” only. If you require departments code and/or department GL account numbers, you can make this change.
IV. Export Your Payroll / GL Entries
- In Harmony Payroll, navigate to Processing > Create GL Records.
- Select the appropriate filters for “Payroll Group” and “Filter by”.
- Click the refresh icon to pull up a list of employees according to your filters.
- Select the employees you want to create GL records for.
- Click “Create”. A document icon will appear next to your employees’ names. Click this icon to view their GL record.
- Select the employees you want to export. Ensure that the correct GL Export Interface is selected in the far right dropdown list and click “Export”.
- Select the appropriate “Employee Identification”: This is how you want your employees to be identified in the transaction.
- Click “Export”. Your file should now be downloaded to your browser’s default downloads folder. If this is not the computer that has QBIS installed, transfer this file to the correct computer.
V. Use QBIS to Import Your File Into QuickBooks® Online
- Launch QBIS.
- If you exported the detailed export from Harmony, select 'Single Transaction'. If you exported the summary export from Harmony, select 'Summary Transaction'.
- Click "Browse" to open a window to select the exported file from Harmony.
- Click "Read" to allow QBIS to read the file you selected. Your GL entries should not be visible.
- Click "Verify" to allow QBIS to check that the file you selected is compatible. At the bottom of QBIS, it should read "Application complete to verify records".
- Click "Sync" to transfer your GL entries into QuickBooks® Online. The 'Status' should now read "Create successfully".
You can also view this video guide:
What is the difference between detailed and summary exports?
If you are using the Detailed export layout, then the interface will create transactions in your "Check" section of QuickBooks® showing the complete check and GL Details.
If you are using the Summary GL export layout, the entire transaction will appear as a single journal entry in QuickBooks®.
How do I make QBIS work for multiple companies?
You must set up and connect QBIS to separate companies. Please follow the steps below to reauthenticate QBIS to connect with your different companies. These steps must be done after QBIS is installed.
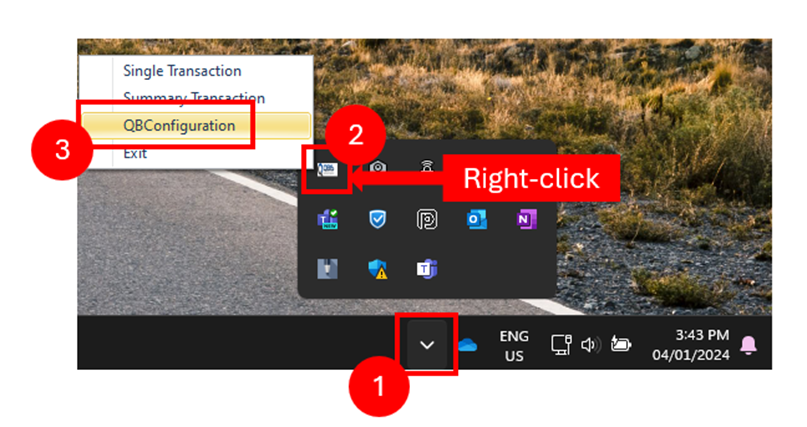
- In the systems tray (bottom-right corner where the date and time are), right-click QBIS.
- Select QBConfiguration.
- Repeat the same steps to retrieve QBO tokens and enter it for the other company as normal.
4. Select the browser you want to use and click "Authenticate QuickBooks". 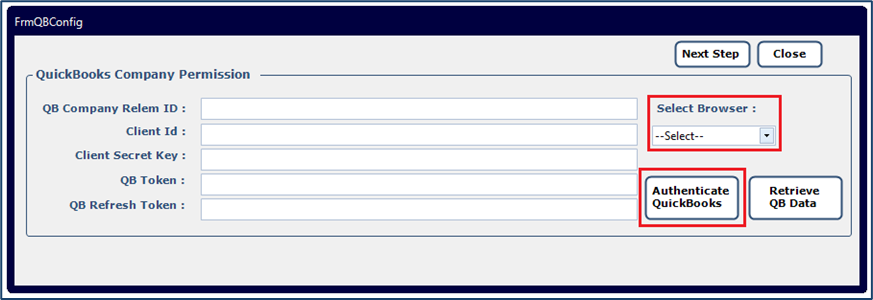
5. In the browser, enter the username and password to sign into the correct company for QuickBooks. 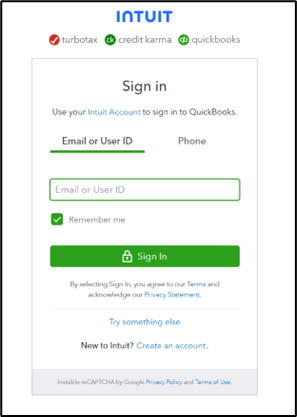
6. If this is your first time connecting QBIS to this company, you must allow "QB Sync V2" to connect to your company in QuickBooks. 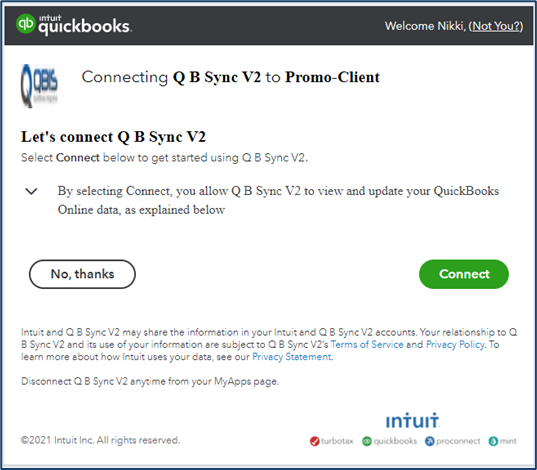
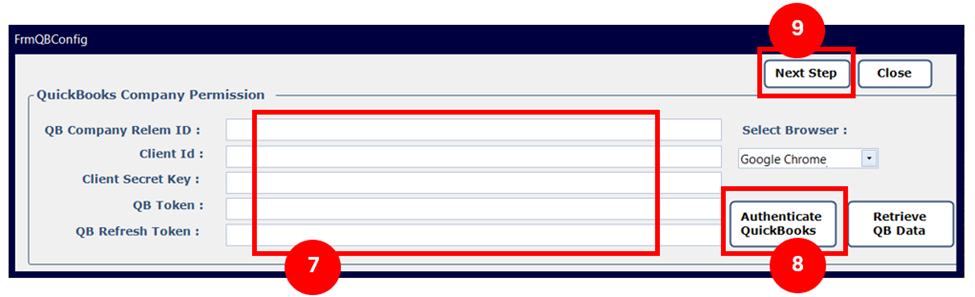
7. In the following screen, copy and paste each key into the appropriate field in QBIS. Ensure that you are not copying and pasting the header or field name into the field as well.
8. In QBIS, click "Retrieve QB Data". You should receive a Token save successfully message.
9. Click "Next Step". You can now begin your file upload to import your GLs into QuickBooks Online.